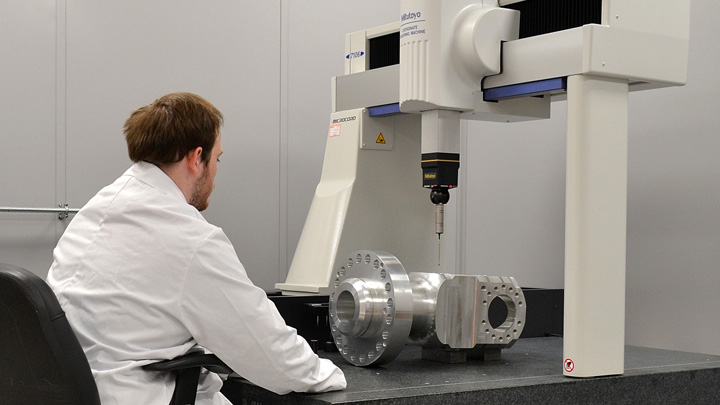
Mitutoyo CMM reach the ‘Summit’ of Quality
Originally established in 1965 to help meet the subcontract component machining needs of the burgeoning UK aerospace industry, over the past 55 years Summit Engineering (Birmingham) Limited has considerably expanded its range of machining competencies and diversified into other equally demanding sectors. While the production and assembly of high quality precision aerospace components remains its principle activity, the busy company now counts equally demanding businesses, involved in the oil and gas and defence industries as customers.
To help ensure that it has the range of abilities to meet its customers’ ever evolving needs and the machining capacity to satisfy growing demands, the West Midlands based business has continually invested in the latest CNC production technology. Summit Engineering’s impressive plant list currently enables the production of high precision parts across a wide range of sizes.

To enable Summit Engineering’s output to be efficiently inspected, a Crysta-Apex CNC Crysta-Apex CNC Coordinate Measuring Machine was recently purchased from Mitutoyo UK. The advanced CMM was installed in a newly-built, environmentally controlled inspection facility at the company’s Solihull based production facility.
Summit Engineering Director, Kevin McCormick explained the reason behind the Mitutoyo CMM purchase. “Summit Engineering’s continuing success is due to our wide range of precision manufacturing and assembly capabilities, our flexibility, rapid response times, and not least the exceptional quality of our manufactured components.
“In addition to our customer specific accreditations we are accredited to ISO9001 and AS9100. Quality permeates every aspect of our activities, besides our skilled production staff making regular in-process checks, our inspection team support their work with rapid feedback related to the status of each individual processes. In addition, thorough final inspection routines are performed. This methodical approach helps to explain our extremely low rework and scrap figures. Kevin McCormick continued. “As we do when looking for new machine tools, when we recently searched for a new CMM, not only did we take into account the proposed machine’s ability, we also considered other factors such as the ease and speed of operation of each model and the depth of support provided, including training.
“We soon dismissed, several other CMMs and, although the advanced Crysta-Apex CNC CMM from Mitutoyo was marginally more expensive than the other machine that made our shortlist, given the importance we place on quality and as the Mitutoyo CMM satisfied our long list of required criteria, we were happy to place an order. As it had the ideal capacity for inspecting the vast majority of our components, we specified a Mitutoyo Crysta-Apex CNC CMM with an XYZ capacity of 705 x 1005 x 605 mm.”
To ensure that it remains a global technological leader in the field of Coordinate Measuring Machine design, Mitutoyo continuously updates its range of machines. Rather than supply a CMM that is a ‘close-fit’ to a customer’s requirements, as Mitutoyo machines are available across a wide range of sizes and accuracy classes, a CMM that corresponds to specific needs is always available. To further guarantee the delivery of a ‘perfect-fit’ CMM, a wide range of contact and non-contact probes and accessories are available.
Crysta-Apex S series CMMs, as purchased by Summit Engineering, are high-accuracy, high-speed, moving bridge type machines. Fist-class design, construction and materials help ensure the accuracy, reliability and longevity of each CMM. The advanced Mitutoyo CMMs feature robust granite bases that provide the machines’ Y-Axis, guide-way, whilst self-adjusting air bearings are used on each axis to give optimum stability during high-speed movement and measurement.
The CMMs’ moving bridges are constructed from a low mass alloy, whilst the external surfaces of both “X” beams and “Z” spindles undergo an oxide coating process that gives them extremely hard surfaces, improving stability and providing excellent wear resistance.
In addition to being ideal for use in Quality control environments, as Crysta-Apex S CMMs are equipped with a temperature compensation system, they are also able to deliver fast, accurate results when located in shop-floor settings.
Summit Engineering Quality Engineer, Stephen Smolak concluded. “Following its trouble free installation our new Mitutoyo Crysta-Apex CMM soon began to make a significant contribution to ensuring the premium quality of our output. Due to its ease of use, soon after their initial training sessions, our operators quickly became confident in the use of our new Mitutoyo CMM, although it helped that, whilst they were still learning, if they were unsure about anything, help was always available via Mitutoyo’s on-line support service.
“In addition to inspecting large, one-off components, we are also able to load multiple smaller parts onto the CMM’s bed, recall the relevant program, then perform a rapid, fully automated CNC mass inspection routine. Dependant on the customer’s requirements, we now archive the generated inspection results or print-off in-depth inspection reports.
“Due to the specifications of our new Mitutoyo Crysta-Apex CMM it is able to inspect our most complex components and also those with extremely challenging accuracy requirements. In addition, our new CMM’s speed and ease of use, means that, not only is it capable of inspecting our current levels of output, it will also be able to handle any future anticipated rises in production.”