Bespoke Mitutoyo Solution Aids Tecomet Inspection Efficiency
Mitutoyo Coordinate Measuring Machines (CMMs) cover practically all precision 3D measuring applications and are available in a wide range of sizes and accuracy classes. Further improving their effectiveness in more specialised areas, Mitutoyo are able to offer complete turnkey CMM systems, including programming and bespoke fixturing.
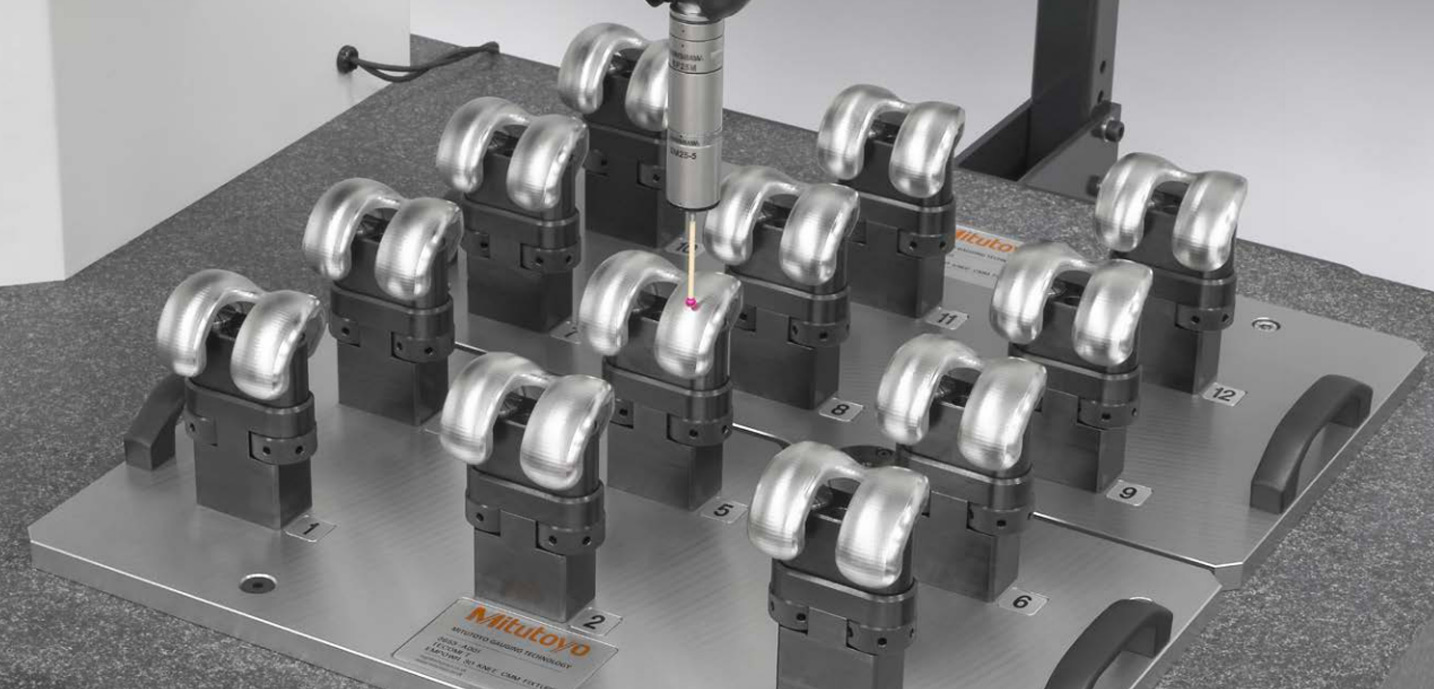
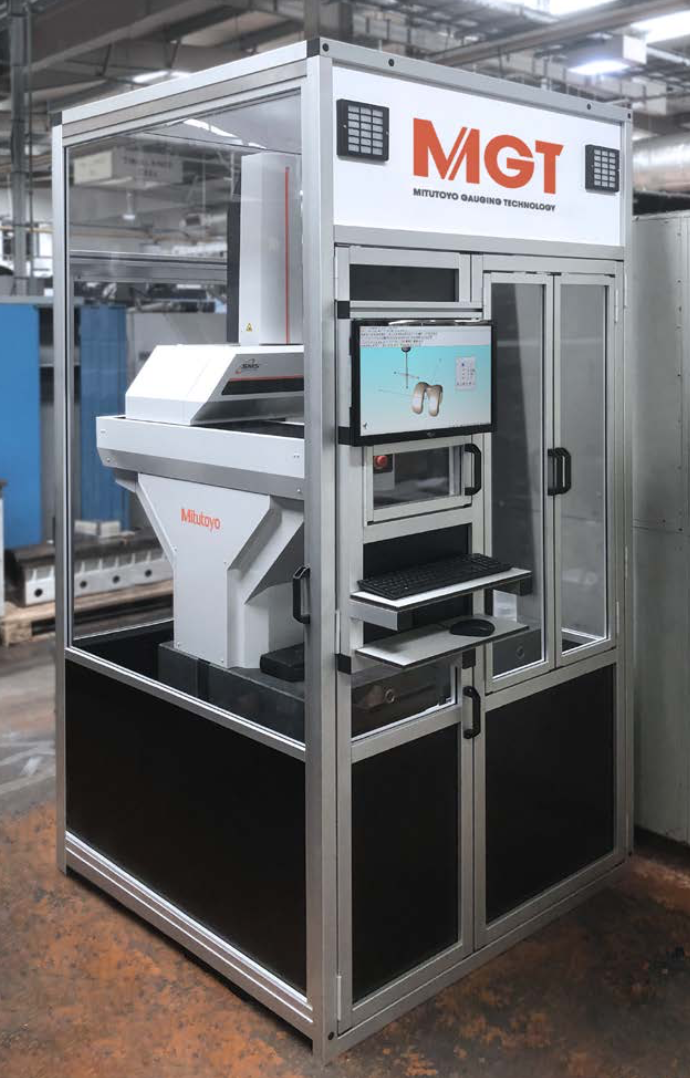
The recent installation of a comprehensive turnkey CMM solution at Tecomet Sheffield, illustrates the advanced design and build capabilities of Mitutoyo Gauging Technology (MGT), a specialist division of Mitutoyo. Throughout this project, MGT worked closely with Mitutoyo’s dedicated subcontract measurement department - Measurement Services. Based on an advanced Mitutoyo MiSTAR Shop-floor CMM, the resulting ingenious inspection system allows the rapid, accurate and automated dimensional inspection of a range of femoral knee joints. Using custom-built, multi-station fixtures to enable the loading of batches of multiple parts, the highly-efficient solution features a dedicated user interface for ease of use, whilst a tailored reporting output aids part sentencing and quality control.

Founded in 1963, Tecomet is a market leading provider of manufacturing solutions for complex, high-precision products and services for the medical device and defence markets. Headquartered in Wilmington, Massachusetts, USA, Tecomet operates 17 global manufacturing facilities in five countries around the world and employs over 2500 people. Tecomet’s global quality and regulatory systems comply with ISO 13485, ISO 9001 and AS9100 requirements and meet the highest International standards for product quality.
Tecomet’s busy Sheffield division boasts a comprehensive range of end to end manufacturing resources, including casting, forging, heat treatment, finishing, CNC machining and EDM capabilities. As with all other Tecomet sites, the Sheffield facility administers a comprehensive Quality Management System that integrates the control, monitoring and management of quality at the source of production.
Explaining the reasons behind the recently installed Mitutoyo inspection system, Tecomet Sheffield Product Engineer, Nigel Smith said. “Tecomet operates as a contract manufacturer and full service provider of implant products and services to Original Equipment Manufacturers throughout the world. Having won a large, long term contract to produce femoral knee joints, we took the opportunity to carefully consider all of our related production and inspection options and to develop a range of effective new methodologies that would further increase our efficiency levels.
“Where our proposals involved purchasing new equipment, we were able to calculate the potential returns on our investments and work out what proportion of the costs involved could be amortised over the life of the contract. We also evaluated the potential continuing advantages to the business of any equipment that we purchased on completion of the contract.
 “The quality of Tecomet Sheffield’s output is of paramount importance and we use a range of advanced quality related tools, including Six Sigma and Statistical Process Control, in addition to Lean Methodologies. As we regard inspection as an integral and vital part of our femoral knee joints production processes, we investigated ways of gaining additional efficiencies in this important area whilst also seeking to improve our precision standards. The answer to our search was found in a custom-designed, highly-efficient inspection system from MGT.” After liaising with Tecomet personnel to ensure all of the business’s requirements were fully understood, the staff of MGT put together a comprehensive proposal based on an advanced, shop-floor proof Mitutoyo MiSTAR CMM. The suggested automated solution was designed to satisfy Tecomet Sheffield’s need for a highly efficient precision inspection system that could process large volumes of the company’s manufactured femoral knee joints close to their source of production. As the bespoke measuring station was to be sited close to machine tools, the proposal included the provision of a transparent protective enclosure to help shield the CMM from potential contaminants. In addition, the scheme included tailored software written by Mitutoyo’s measurement services department, a barcode scanner for ease of operator use and the supply of multi-station fixtures to enable the easy and quick loading of batches of knee joints onto the CMM.
As the recently launched Mitutoyo’s MiSTAR 555 was designed to provide high levels of inspection speed and accuracy in less than perfect environments it was the ideal CMM to base Tecomet’s bespoke system on. The MiSTAR 555 boasts a maximum permissible length measurement error specification of (2.2 + 3.0L/1000)μm and an XYZ measuring range of 570mm x 500mm x 500mm. The advanced CMM benefits from Mitutoyo’s recently developed smart factory functionality that allows real-time monitoring of machine performance data as well as measurement data. Further aiding its performance in shop-floor situations, the MiSTAR 555 combines technologies such as symmetric structure, uniform material and temperature compensation to provide guaranteed temperature accuracy in a range of 10 to 40ºC. Nigel Smith continued. “The results of our cooperation with MGT and the system they designed has proved extremely successful. Our bespoke inspection system is now fully operational and delivering the levels of precision and efficiency that we were looking for. “Now, after one of our Mitutoyo designed fixtures is loaded with multiple femoral knee joints and mounted onto the bed of the CMM, the operator is only required to instigate a measurement program for a rapid, fully automated, mass measuring routine to take place. On completion, as each position on each fixture has an ‘address’ the system then quickly delivers in-depth dimensional analysis related to each individual femoral knee joint. When required, this rapid data feed-back enables corrective actions to be quickly taken. As our new inspection station is located close to our production cell, it further speeds-up the flow of this important information. On completion of an inspection routine all inspection data is automatically archived to allow traceability.”