Mitutoyo standardises fast and compact bespoke automated measuring system
Once in a while a custom development for one particular customer turns out to be just what many others also want – they just didn’t know it until they saw it. This is exactly what the Mitutoyo Gauging Technology (MGT) division found after development of a highly successful system for batch measurement of small parts for an orthopaedic equipment manufacturer. A unique combination of speed and accuracy in a self-contained, space-saving package resonated with enough potential customers that MGT decided to promote the system to standard bespoke status, thus enabling reduced cost with faster delivery for new customers choosing this solution to their particular metrological challenge.
MGT is that part of Mitutoyo UK responsible for providing a service to propose, design, develop, test and install dedicated measuring solutions to meet specific customer requirements. Standard Mitutoyo products are combined with electric, pneumatic, hydraulic, optical and computing ancillaries as necessary. A common requirement is for automated fixturing to meet the need for manipulation of a part in ways that make the most of today’s sophisticated measuring technology. This often involves rotation, tilting or even inversion to present the measurable features of the part to the measuring machine in the most efficient way.

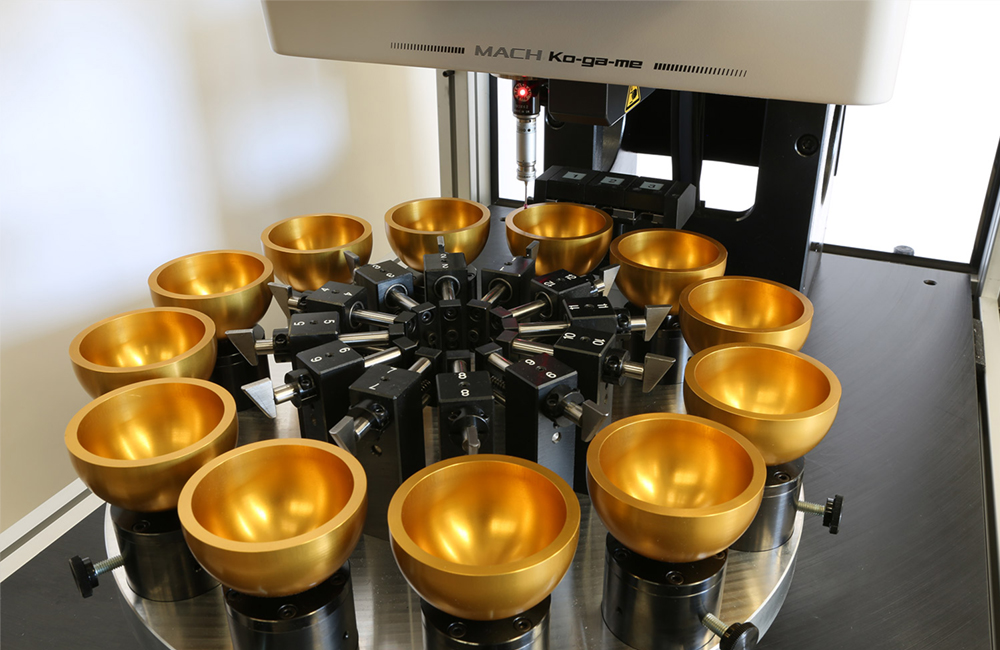
At the heart of this, now standard, batch measurement package is Mitutoyo’s versatile MACH Ko-ga-me CNC Coordinate Measuring Machine (CMM). This compact device is designed for speed and accuracy – ideal for diverse measuring applications ranging from mounting on large structures such as machine tools for in-situ part measurement through to compact automatic measuring stations. Exceptional three-dimensional acceleration of better than two-thirds g means that maximum traverse speed is reached within 10mm from a standing start, mainly due to the low mass of the moving elements. This means the probe reaches every measuring position significantly faster than is possible with a general-purpose CMM. The obvious potential to reduce cycle time was a major factor in selecting the MACH Ko-ga-me for this bespoke application.
The challenge in the orthopaedic application was to get the parts into, and out of, the MACH Ko-ga-me’s modest 120x120x80mm (XYZ) measuring volume as quickly as possible to maximise the high throughput potential. As can be seen in the photograph of a complete installation the key component is a precision indexing table that mounts custom fixturing to hold the part during the measurement cycle. This enables each part to be successively rotated into position for running an automatic batch measuring cycle after loading. In the particular system shown up to 12 parts can be mounted at one time for rapid positioning and measurement by the CMM’s touch-trigger probe. Of course in the case of the standard system now offered the only extra component required would be this dedicated fixturing to suit the customer’s part.

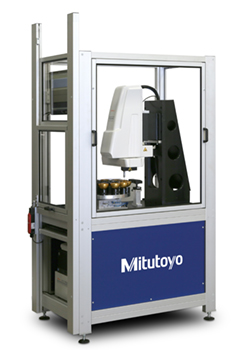
MGT has prioritised the safety and cleanliness factors with this system so the MACH Ko-ga-me and indexing table are totally enclosed with interlocked access only from the front for loading/unloading parts. The CMM’s controller is mounted underneath the table together with a PC running Mitutoyo’s widely-used MCOSMOS measurement and analysis software. The keyboard and mouse are conveniently positioned on a slide-out tray at hand level with the monitor safely out of the way at head height.
Offering cycle-time reductions of up to 50%, together with the absolute minimum footprint, the MACH Ko-ga-me CMM has proven ideal for use in small-part automated-measurement solutions, especially in locations where every square metre of space is valuable.