Custom Solution Meets Demanding Manufacturing Requirements
Vision system facilitates measurement when fixturing constrains access to a workpiece.
Ramcel Engineering Company (www.ramcel.com), located in Northbrook, IL, was founded in 1950 with the mission of providing precision, custom metal stamping, as well as contract mechanical assembly services, and robotic MIG & TIG welding services.
Ramcel Engineering serves diverse markets with its output evenly split across automotive, computer/telecom and consumer applications. Housed in up-to-date facilities totaling 60,000 square feet, the company is equipped with a full range of stamping presses supported by extensive engineering capabilities, leading-edge software and automation. Ramcel prides itself on accepting and successfully delivering jobs that its competitors often find too challenging.
Safety-critical steering column component
Such is the case with a component currently in development for use in an automobile power steering column. The program was awarded to Ramcel Engineering when the work had not been satisfactorily handled by the customer’s original vendor.
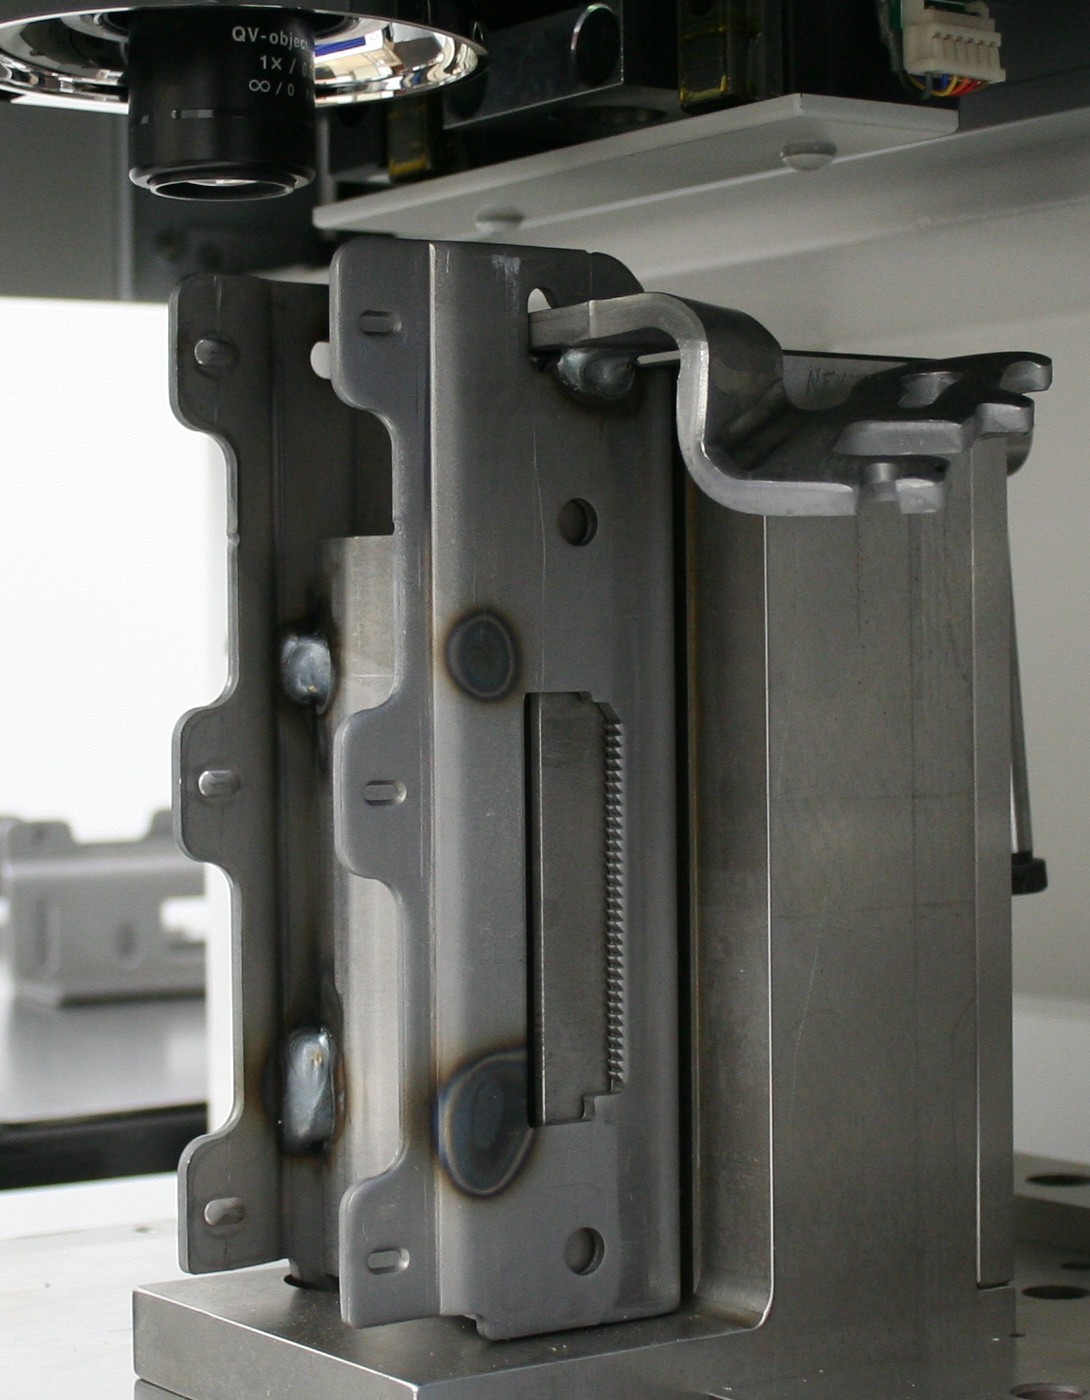
This component is a compression bracket assembly comprising a number of elements that are stamped, bent and then welded together. The bracket is fabricated of high-strength low-alloy (HSLA) steel and incorporates a “rack” of approximately 30 small teeth that are punched and shaved-out at less than material thickness using a 12-station progressive die running in a 600-ton press.
The teeth perform a safety-critical function for the steering column: the column is designed to telescope inward, reducing forces on the driver’s torso when accelerated in certain types of crash impacts. Under these conditions, the bracket teeth enable the steering column system to “ratchet” into a new position, and in doing so, providing the right amount of “give” as the system responds to inputs including the driver’s weight, distance from airbag, use/non-use of seat belt, and rate of vehicle deceleration.
“Simulating” the assembled state
As an ISO 9001: 2008/TS16949: 2009-certified company, Ramcel Engineering is no stranger to devising measurement/inspection routines designed to ensure that the most demanding automotive manufacturing requirements are met efficiently and cost-effectively.
The steering column is designed to telescope inward, reducing forces on the driver’s torso when accelerated in certain types of crash impacts.
That is why in seeking to improve overall economics of the steering column bracket program, Tim Booth, Ramcel chief engineering manager, decided to employ a unique measurement inspection routine. The teeth would be measured before and after all bracket elements were welded together. But – and here is the tricky part – Booth determined it would significantly improve process capability (Cpk) if the bracket’s overall datum structure could be made to reflect its welded state before it was actually welded.As a result, measurements taken in this way could predict, beforehand, whether or not brackets would achieve specified post-welding tolerances.

Booth elaborated, “In other words, we decided it would be desirable, at the stage just prior to welding, to ‘simulate’ the final, assembled geometry of the part, and to measure it at that point. That way we’d be confident, before welding, that we wouldn’t be processing parts that would ultimately be rejected due to the effects of welding. We were looking at overall tolerances that could go down to as little as .002 inch – pretty tight for a stamped assembly.”
To accomplish this, the pre-welding bracket could not be measured in its free state. Rather, it needed to be fixtured in such a way that clamping forces could be generated on a bracket so that its datum structure would be in a fixed state, thus duplicating the datum structure of a bracket after welding. In this way, measurements obtained on features including tooth locations, welding dimples, tabs and slots, as well as on the overall relationships between walls, would duplicate those as measured on a bracket in its final, assembled state.
Robust fixture obscures part
There was a problem, however. A fixture sufficiently robust to generate the necessary clamping forces would be heavy – and almost completely surround the workpiece. This would make it difficult to access features for inspection. Booth commented, “To facilitate this approach to inspection, we thought it best to integrate, upfront, the design of the fixture together with the capabilities of the measuring equipment to be used. It made sense to collaborate with a metrology systems vendor who also understood fixtures. The idea was to work with a resource that could turnkey the measurement solution – from participating in fixture design through provision of metrology hardware and software.”
Ramcel evaluated a number of metrology equipment vendors, comparing equipment plus technical support offerings. As a result, Ramcel decided to consult with Mitutoyo America to see if that company could recommend a solution.
A solution with vision
Joe Gallo, Ramcel’s director of quality, explained, “The bracket fixture was designed with ports to provide access to features requiring measurement. We supplied Mitutoyo with a prototype fixture together with sample prototype parts and asked for a measurement plan.”

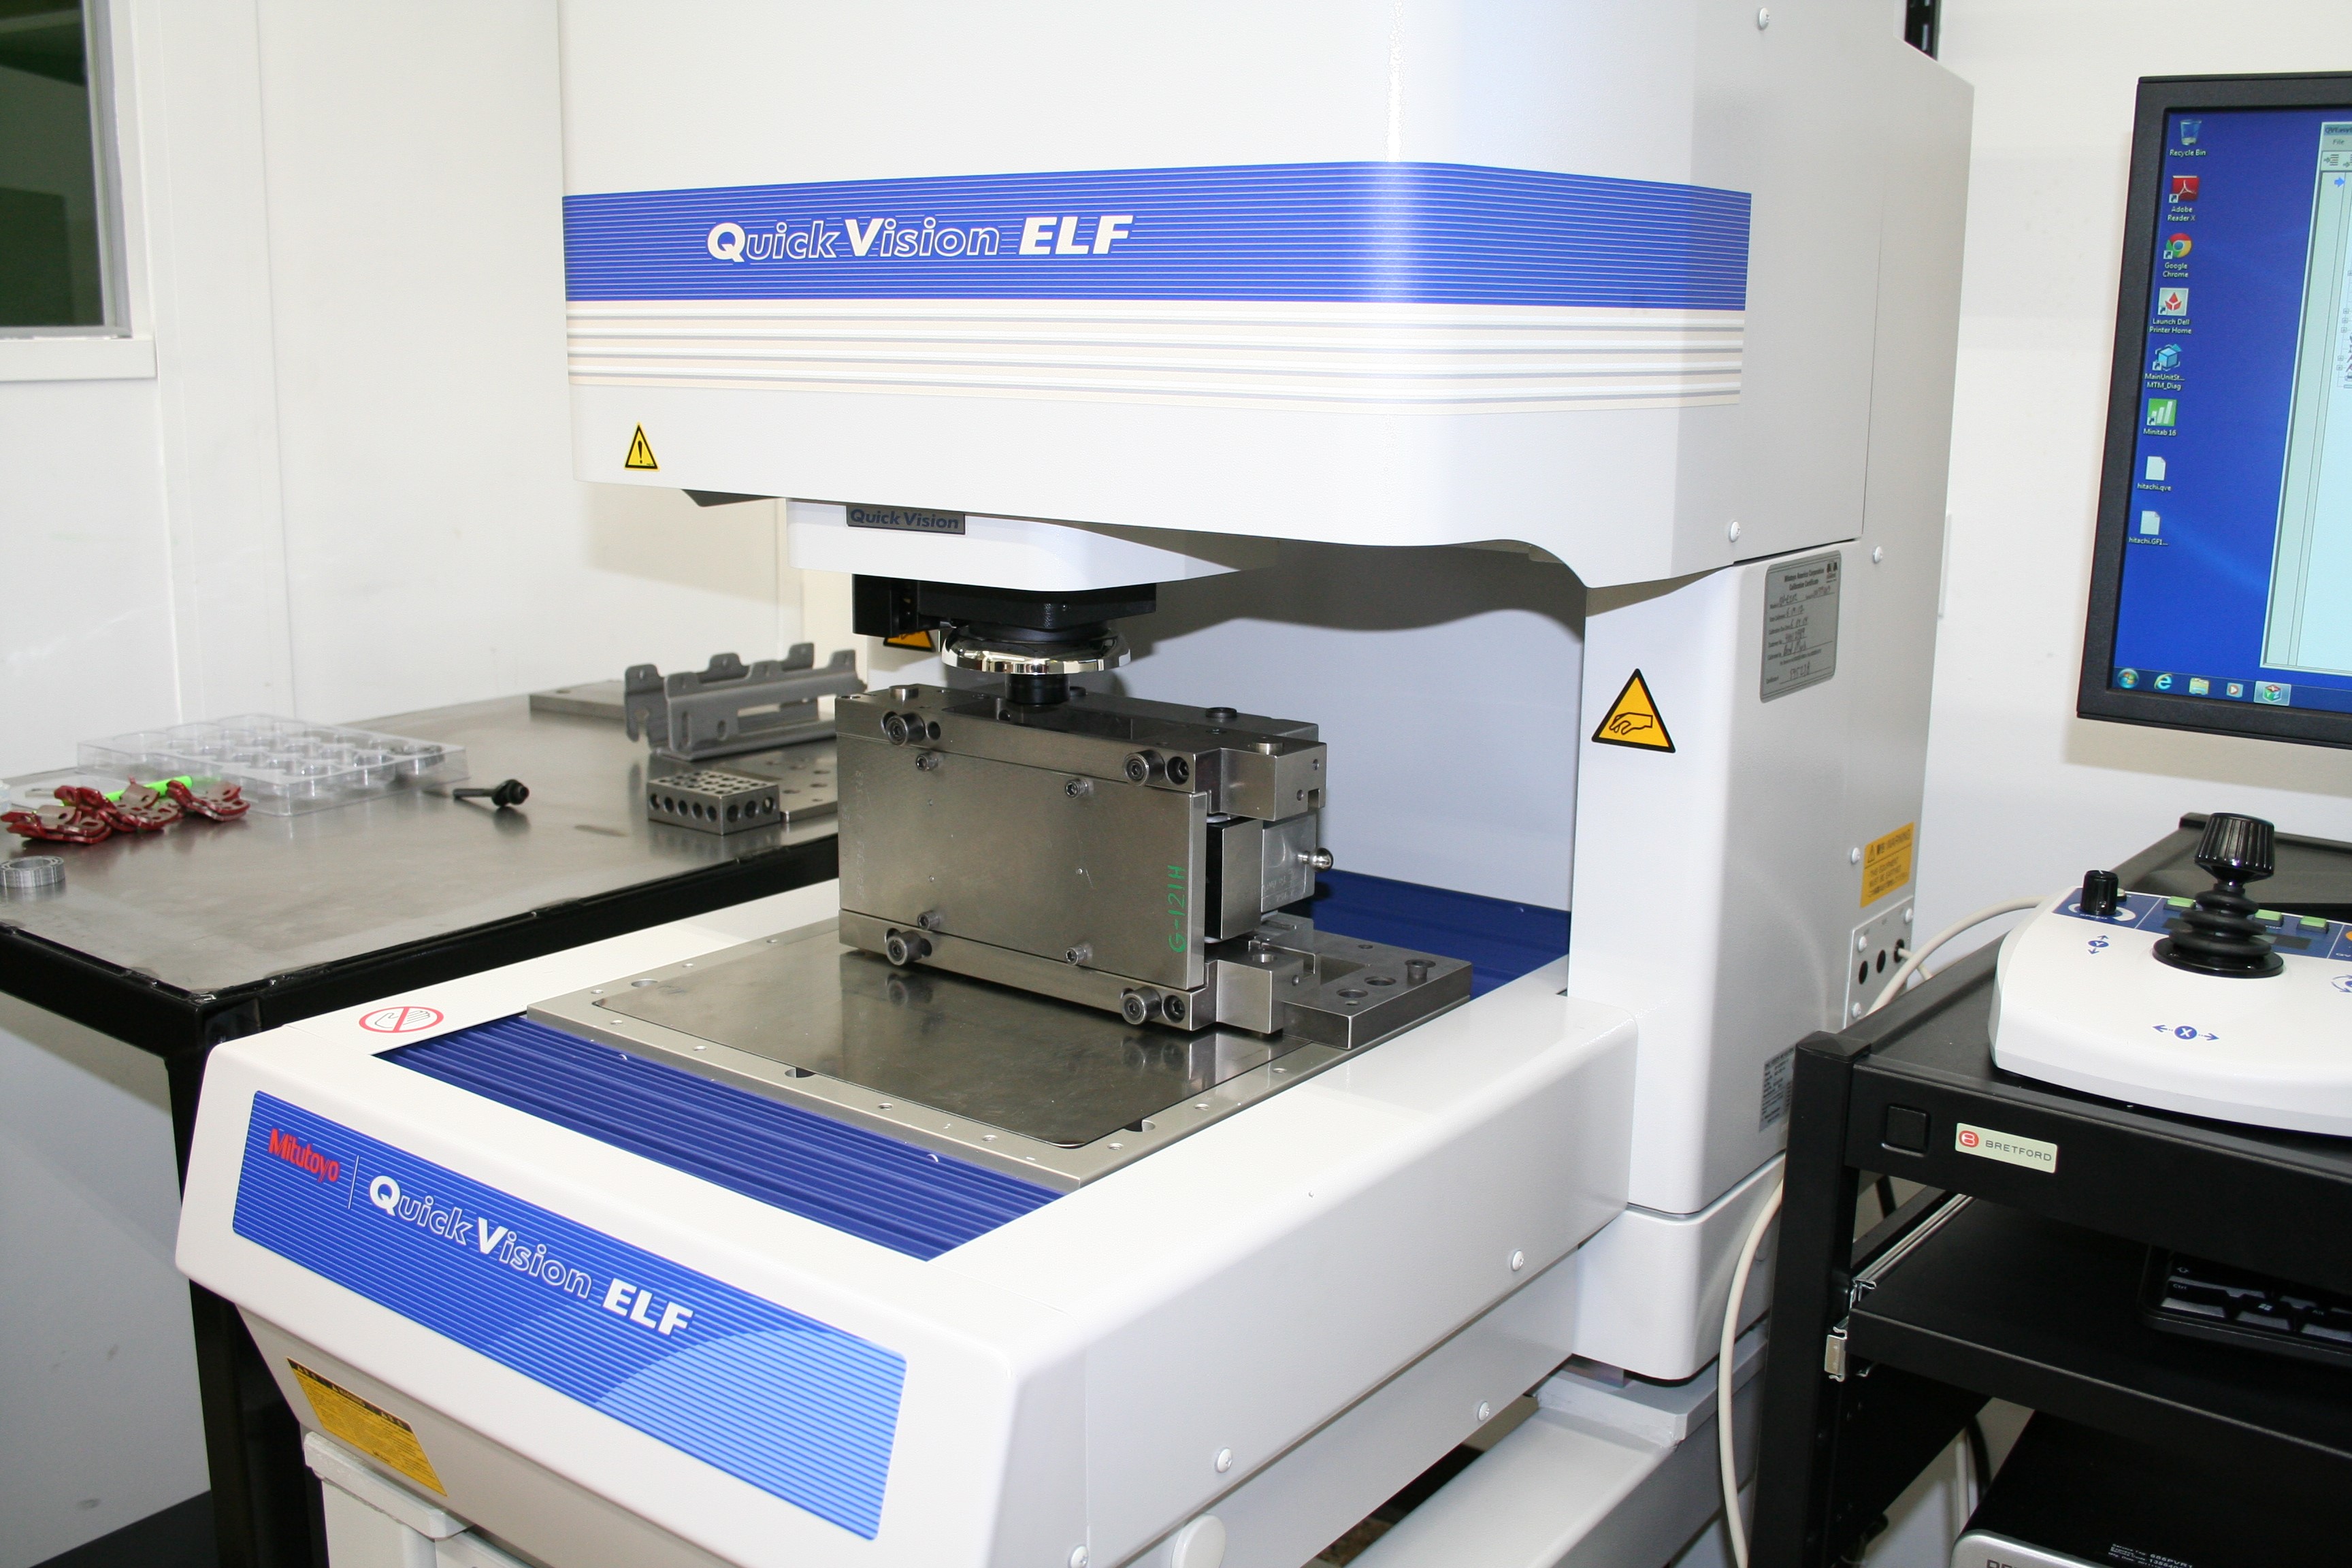
The Mitutoyo Quick Vision Elf is a compact (footprint 57-inch H x 22.7-inch W x 39.1-inch D) full-featured CNC vision system.
Within weeks, at the Mitutoyo M3 Solution Center in Aurora, IL, Mitutoyo demonstrated a turnkey solution based on use of a Mitutoyo Quick Vision® Elf measuring system.
The Mitutoyo Quick Vision Elf is a compact (footprint 57-inch H x 22.7-inch W x 39.1-inch D) full-featured CNC vision system that is priced mid-level relative to Ramcel’s budget.
The benefits of vision vs. contact measurement were obvious: Introducing a contact-probe head through the fixture’s ports then moving a stylus inside the fixture would be problematic, at best. On the other hand, the QV Elf’s advanced, programmable, long-life LED lighting (including coaxial/stage lighting as well as ring lighting) and highly responsive focusing system would facilitate “seeing” through the fixture’s ports; the system would quickly obtain detailed, accurate images for processing.
Software support
The Quick Vision Elf is supported by Mitutoyo’s proprietary QVPAK software featuring a refined GUI, extended 3-D data processing functions, and illumination tools. The program simplifies measuring profiles on the bracket’s “rack of teeth” – critical because teeth are inspected on a 100% basis.
Gallo commented, “Mitutoyo’s QVPAK software makes it easy to set-up illumination and magnification sequences. This, combined with the amenability of the software to editing, makes QVPAK ideal for our application. We need to be able create routines that make it practical for operators to come in and use the machine with no glitches – and without calling for Mitutoyo’s intervention.”
QVPAK displays measurement results in 2D/3D graphics for easy interpretation. Single mouse-click edge-detection, abnormal data elimination, noise filters, and datum fit, plus a variety of additional editing and control tools are standard. Optional software modules extend QVPAK functionality. For example, FormPak-QV – which is especially suited for analysis of the teeth – facilitates comparison of entire tooth profiles to the datum structure in real time. Whiskers that deviate from nominal are displayed for each measured data point.
Ramcel captures Quick Vision Elf measurements via MeasurLink®, Mitutoyo’s proprietary, Quality Management Software that enables an enterprise-wide manufacturing process control system. MeasurLink combines real time on-line data collection, real time SPC charting and analysis for operators, and real time Quality Control/Supervisor reporting and alerting, including e-mail alerts. MeasurLink is designed for integrated networks to provide a quality information sharing system including a comprehensive metrology solution.
Ramcel currently measures 150 features on the fixtured bracket, with each measurement cycle taking about 4-5 minutes. Gallo concluded, “The measurements we’re obtaining through this metrology regimen give me peace of mind knowing, that in terms of dimensional metrology, we are applying the latest, most effective techniques to help provide maximum value to our customer.”